#1 Low Carb & Keto Diet App Since 2010
Track macros, calories, and access top Keto recipes.
prep time
4 h 0 min
cook time
50 min
ready time
4 h 50 min
Keto Baked Alaska
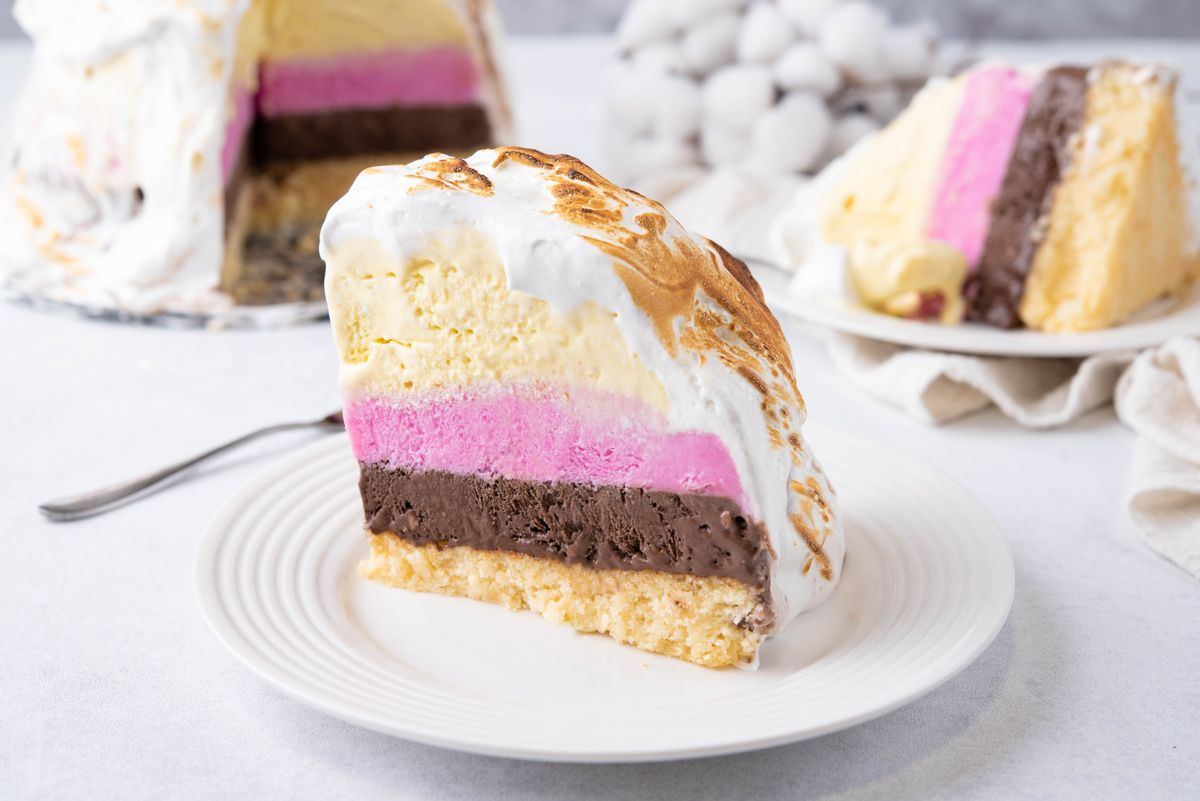
Having a piece of a decadent baked Alaska cake while on a Keto diet sure sounds great! This fantastic recipe is a wonderful combination of three flavors of ice cream, a spongy base, and a beautiful browned Swiss meringue. Choosing the right ice cream for this cake means you won't be adding too many carbs to this beautiful dessert and you will still be within your daily carb limits. Although it takes a little extra time, it is super easy to prepare and it can last for days in the freezer. Please note that the preparation time includes the time needed to freeze each layer of ice cream. But, of course, it is more than worth it! This beautiful cake can serve perfectly as an afternoon treat or even a wonderful holiday dessert.
Which ice cream should I use?
Any type of Keto ice cream will work perfectly for this recipe. For example, our Keto Creamy Chocolate Ice Cream, Keto No-Churn Homemade Style Vanilla Ice Cream, and Keto No-Churn Strawberry Mascarpone Ice Cream would be great for this cake.
How to store the cake?
Baked Alaska should be stored in the freezer until ready to serve.
I don't own a kitchen torch. Is there some other way to brown the meringue?
If you don't own a kitchen torch and you still wish to brown the meringue, you can put the cake in the oven at the lowest temperature for a couple of minutes. Once the meringue has browned, quickly move the cake to the freezer.
Net Carbs
5 g
Fiber
6.8 g
Total Carbs
58.5 g
Protein
11.9 g
Fats
47.8 g
534 cals

#1 Low Carb & Keto Diet App Since 2010
Track macros, calories, and access top Keto recipes.
Ingredients
Almond flour
1.33 cup
Coconut flour
0.33 cup
Baking powder
1 tsp

Erythritol
0.33 cup
Butter
0.5 cup
Sour cream
0.5 cup
Egg
3 medium
Almond milk
0.25 cup

Ice Cream, Strawberry
2 cup

Ice Cream, Chocolate
2 cup

Ice Cream, Natural Vanilla
2 2/3 cup
Egg whites
4 medium

Erythritol
1 cup
Lemon juice
1 tsp
Cream of tartar
1 tsp
Recipe Steps
steps 14
4 h 50 min
Step 1
Wrap a 10-inch bowl in plastic wrap. Scoop the vanilla ice cream into the bowl creating an even layer. Freeze for 1 hour.Step 2
Remove the frozen vanilla ice cream from the freezer. Gently, scoop the strawberry ice cream over the vanilla layer. Using a rubber spatula, flatten the surface as evenly as possible to create an even layer. Freeze again for one hour.Step 3
Once the strawberry layer has been set, add the remaining chocolate ice cream. Flatten the surface as evenly as possible again. Freeze for another hour.Step 4
Preheat the oven to 350°F. In a large bowl, add butter, sour cream, eggs, and almond milk. Butter and sour cream should be at a room temperature. This will make a mixing process much easier.Step 5
Using a hand mixer with whisking attachments, beat for 2-3 minutes, starting at the lowest speed setting. Beat until fully incorporated. The mixture should be light and airy.Step 6
In a separate bowl, add almond flour, coconut flour, baking powder, and sweetener. Mix until fully incorporated. Make sure to break any lumps.Step 7
Add the dry ingredients to the egg mixture. Using a hand mixer with whisking attachments, beat well until fully combined. This should take a couple of minutes. You will get a slightly sticky batter.Step 8
Butter a 10-inch springform pan and line it with parchment paper. Pour in the prepared batter. Using a rubber spatula, flatten the surface as evenly as possible to get an even layer.Step 9
Bake for 50 minutes or until a toothpick inserted in the middle comes out clean. If the cake starts to brown too much, lightly cover with a piece of aluminum foil. When done, remove from the oven. Cool the cake completely.Step 10
Place a heatproof bowl over a pot of simmering water. Add egg whites, sweetener, and cream of tartar. Whisk until the sweetener has completely dissolved and the mixture is warm.Step 11
Remove the bowl from the heat. Using a hand mixer, beat until stiff peaks form (about 10 minutes) adding the lemon juice at the end. To get perfect stiff peaks, start mixing at the lowest speed setting and then gradually increase the speed until you have reached the maximum.Step 12
Remove the ice cream bowl from the freezer and invert it onto the cake. Using a rubber spatula, spread the meringue over the cake until fully coated. You should work quickly at this point to prevent the ice cream from melting. Once you have coated the entire cake, place it in the freezer for another 15 minutes.Step 13
Using a kitchen torch, brown the peaks of meringue according to your taste. If you don't own a kitchen torch, you can skip this step completely or place the cake in the oven at the lowest temperature for a couple of minutes. Place the cake in the freezer immediately until ready to serve.Step 14
Serve a piece of this delicious Keto cake as a wonderful dessert or an afternoon treat. Optionally, garnish the cake with some fresh berries of choice. A drizzle of your favorite Keto maple-flavored syrup is another great serving idea for this lovely dessert.


